Close up of a plumber fixing a water leak in a sink drain siphon pipe.

TL;DR: Stay Ahead of Plumbing Problems

Plumbing issues in commercial settings can drain budgets and disrupt business. Proactive care keeps water supply steady, avoids costly emergencies, and extends system life. A maintained plumbing system means fewer surprises and more peace of mind.

  • Proactive checks stop small leaks before they grow
  • Reactive repairs lead to higher bills and downtime
  • Planned maintenance protects health, safety, and compliance
  • Simple daily habits prevent plumbing emergencies

Picture a burst pipe flooding your business lobby. That kind of emergency drains your budget, upsets tenants or customers, and can shut operations for days. Smart commercial building owners know prevention is always better than scrambling to fix damage.

Regular commercial plumbing maintenance keeps your system in good shape. A preventative program stops small issues from turning into expensive repairs. It also keeps everything running smoothly so your business can focus on daily operations.

Planned commercial plumbing maintenance is a smart investment. It saves money, avoids stress, and protects your property.

What Is Proactive (Preventive) Commercial Plumbing Maintenance?

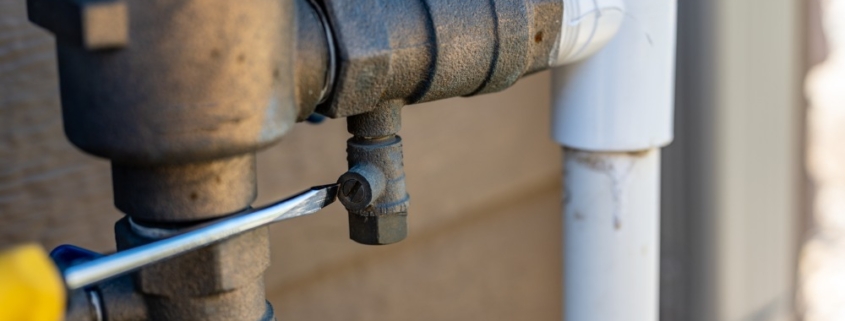
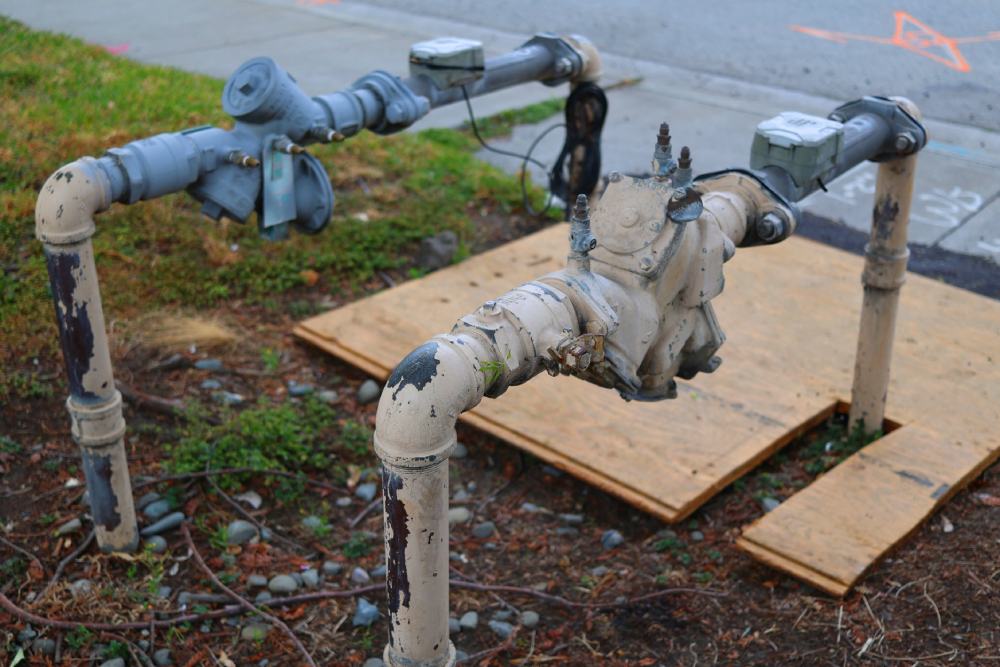
A commercial plumbing preventative maintenance program puts you in control. Instead of waiting for something to break, you set a schedule for routine inspections and regular care. That means checking for small leaks, clearing drains, and giving water heaters or boilers a quick tune-up before they cause trouble.

This approach keeps commercial plumbing systems reliable. A well-maintained plumbing system also reduces water supply waste and keeps pressure steady.

Here’s what you get with a proactive approach:

  • Scheduled inspections by skilled commercial plumbing maintenance services
  • Routine cleaning of pipes, drains, and grease traps
  • Tested shutoff valves and water pressure governors
  • Repairs planned ahead of failures

You gain many advantages:

  • Predictable maintenance costs instead of surprise bills
  • Fewer emergencies to disrupt your business day
  • Longer equipment life and fewer replacements
  • Improved health and hygiene by avoiding hidden leaks or clogs

Systems last longer, issues get fixed early, and your budget stays intact. Commercial property owners who take this route face less stress and almost never see dramatic plumbing failures.

Water and moisture damage has worn away the room ceiling. Damaged and stained interior ceiling due to water leakage.

Understanding Reactive Maintenance: When Is It Used?

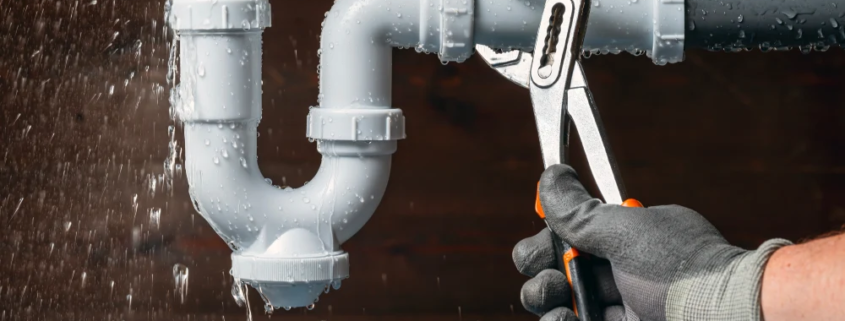
Reactive maintenance means you only call for help when something goes wrong. Burst pipe? Overflowing toilet? This type of repair comes at a high cost: more expensive fixes, bigger messes, and longer downtime.

Common situations that need immediate, unscheduled repairs:

  • Sudden leaks from aging pipes
  • Blocked drains or sewer backups
  • Failed water heaters or frozen lines

These problems often strike at the worst times—holidays, weekends, or in the middle of a busy workday. Relying on reactive repairs usually leads to:

  • Higher repair bills due to urgent labor and parts
  • Business interruptions from closed restrooms or water shut-offs
  • Repeated issues when underlying causes go unchecked

If you only tend to plumbing when disaster strikes, you risk more breakdowns, unhappy tenants, and bigger losses.

Why a Planned Commercial Plumbing Maintenance Program Matters

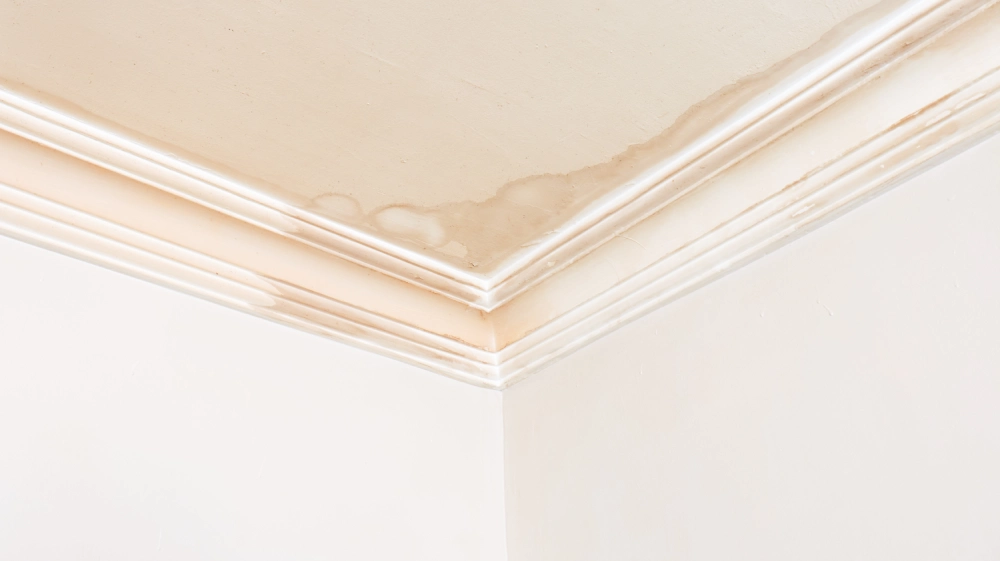
A scheduled commercial plumbing preventative maintenance program offers peace of mind. You stop guessing when pipes or drains will fail. Skilled plumbers catch the small leaks before water stains show up or ceilings collapse. Think of it like routine oil changes for your car—skip them, and you risk engine failure at the worst possible moment.

Here’s what a routine maintenance plan can prevent:

  • Leaking pipes behind walls that lead to mold and property damage
  • Clogged drains that flood bathrooms, causing health hazards
  • Water heater breakdowns that halt normal building operations
  • Sewage backflows that force emergency shutdowns

With planned commercial plumbing maintenance:

  • Costs stay low and steady
  • Local health codes get met without last-minute scrambling
  • Your building’s reputation stays clean

Skipping regular service puts your business at risk for sudden closure or large insurance claims. Staying ahead keeps you open and in good standing.

Tips for Effective Commercial Plumbing Maintenance

Keeping your building’s systems in shape doesn’t have to be complicated. Use these steps to cut risk and keep your property running:

  1. Hire professional commercial plumbing maintenance services for regular checkups.
  2. Log every inspection and repair so nothing falls through the cracks.
  3. Schedule seasonal checks (especially before winter or heavy use periods).
  4. Train your staff to spot trouble early, like slow drains, water stains, or dripping fixtures.
  5. Customize your maintenance plan to fit your building’s age, size, and unique needs.

Simple habits make a big difference. Check water heaters for leaks, wrap exposed pipes before a freeze, and keep grease out of drains. Over time, those small steps add up to real savings.

Stay alert. Act quickly. Routine care costs much less than an emergency call.

Why Commercial Plumbing Maintenance Gives You Peace of Mind

Waiting until something breaks down isn’t a good strategy. Proactive commercial plumbing maintenance pays off. It saves money, cuts down on emergencies, and helps your systems last longer.

A commercial plumbing preventative maintenance program is a smart investment. It means fewer repairs, steadier costs, and less risk of costly business disruption. Ready to protect your building and budget? Learn more about our commercial plumbing services here.

Using a flathead screwdriver to close the test cock when winterizing backflow preventer

TL;DR
Winterizing your backflow preventer protects plumbing, avoids costly repairs, and keeps irrigation systems safe. Simple steps now save stress later.

  • Shut off the water
  • Drain every valve fully
  • Wrap the unit with insulation
  • Prevent freezing damage
  • Gain peace of mind all winter

When the first frost hits, your backflow preventer shouldn’t be the weak spot. Skip winter prep, and water can freeze inside, split pipes, or cause costly repairs. Even one missed step can disrupt service or damage your system.

Winterizing now saves time, stress, money, and trouble when spring returns. Here’s how to drain and protect your backflow device, plus how to winterize backflow valve parts before the cold arrives.

What Is a Backflow Preventer and Why Is It at Risk in Winter?

A backflow preventer is a safety device that keeps dirty water out of your clean supply. You’ll see it on irrigation systems, sprinklers, and other outdoor plumbing. Most sit where the outdoor line meets the main, often in the yard, garden, or just outside the house.

Because these devices sit outside, they’re exposed when the temperature drops. If water freezes inside, ice can crack valves, seals, or housings. That means leaks, costly repairs, or contamination, not to mention insurance headaches. The fix is simple: winterize backflow preventer parts before the cold sets in.

Tools and Supplies Needed to Winterize a Backflow Preventer

Arm yourself with the right gear before starting. Having everything ready makes the process easier, quicker, and safer.

What you’ll need:

  • Adjustable wrench or pliers
  • Standard screwdriver
  • Towel or small bucket
  • Pipe insulation or foam covers
  • Weather-resistant insulation tape
  • Plastic bag or weatherproof cover
  • Compressed air (for systems with a blowout option)
  • Thick gloves and safety goggles

Safety gear matters if you’re working with pressurized water or compressed air. Wear gloves to prevent cold burns and goggles to block spray.

Step-by-Step Guide: How to Winterize Backflow Preventer Systems

Follow these steps for how to drain backflow preventer systems and get them ready for the cold. Skipping one step can leave water trapped, so move carefully and double-check.

Shutting Off the Water Supply

  1. Find the shutoff valve inside your home or basement, just before the line heads outside to your backflow preventer.
  2. Turn the valve to “off.” If it’s stiff, use a wrench for grip.
  3. Confirm the water is off by lifting an outdoor faucet or test cock; no new water should flow.

Commercial, residential backflow prevention water system

Draining the Backflow Preventer

  • Locate the test cocks on the backflow preventer body.
  • Place a bucket or towel under each valve to catch leftover water.
  • Slowly open each test cock or backflow valve with a screwdriver, letting water drain out fully. A soft hiss or trickle of water means it’s working.
  • If your system has drain plugs or valves, open them in sequence to clear trapped water.
  • Use compressed air on low, if available, to blow out the last drops through the blowout port. Avoid high pressure, which can damage seals.

Insulating and Protecting the Unit

  • Wrap the device in foam pipe insulation.
  • Secure with weatherproof tape so it won’t slip in wet or windy weather.
  • Cover the setup with a plastic bag or insulated backflow preventer cover.
  • Make sure no parts are exposed. Gaps let ice sneak in.

Can a Backflow Preventer Freeze If Properly Winterized?

Can a backflow preventer freeze if properly winterized? When drained and wrapped, it rarely does. The real risk is trapped water or exposed parts. Miss a test cock or use thin or loose insulation and freezing becomes more likely.

Best practices:

  • Drain every valve, port, and test cock fully.
  • Use thick, weatherproof insulation, not just a towel.
  • Check insulation after storms to make sure it stays sealed.

Common mistakes include missing a drain plug, closing test cocks too early, or using poor-quality covers.

When to Call a Professional for Winterizing Help

Sometimes a setup’s location or design makes the task tricky. If your backflow preventer is buried, behind landscaping, or tied to complex plumbing, call a pro.

Signs you might need help:

  • Can’t locate all valves
  • Difficulty shutting off water or draining system
  • Unclear on steps due to unique piping
  • Previous winter damage

A licensed professional can drain, wrap, or show you how to remove backflow preventer systems. Services often include a full inspection, spotting leaks or wear before they become emergencies.

Keep Your Backflow Preventer Safe This Winter

Winterizing your backflow preventer keeps your plumbing safe. To do it correctly, shut off the water, drain every valve, and wrap the unit well. Taking these steps helps you avoid repairs and stress later. With your device protected, you can relax when the freezing winds arrive.

Want expert help? Learn more about our backflow installation and inspection repair services here.

Sump pump manhole with water backup

TL;DR:

This guide explains the differences between sump pumps and ejector pumps, helping you choose the right system for your home. Learn how each pump works, their applications, and maintenance needs to protect your basement.

Main Points:

  • Sump pumps remove clean water, preventing basement flooding.
  • Ejector pumps handle wastewater and solids.
  • Choose based on plumbing layout and local codes.
  • Regular maintenance is crucial for both systems.

Keeping your basement dry and your plumbing working right starts with choosing the correct pump system. Many homeowners struggle to tell the difference between sump pumps and ejector pumps. Both devices move water, but each has a separate purpose.

Picking the wrong one could leave your house at risk. This guide explains what sump pumps and ejector pumps do, how they work, and how long ejector pumps last. It also covers how both systems help protect your home. Use this information to make the best choice for your home’s drainage or wastewater needs.

What is a Sump Pump?

A sump pump removes water from basements and crawl spaces. It is usually installed in a pit (sump basin) at the lowest point of a basement floor. When heavy rain hits or when snow melts, water naturally collects here.

How does a sump pump work?

Water fills the pit. The pump senses the rising level. Once triggered, it powers up and pushes water through a discharge pipe, sending it safely away from the house.

Common Applications:

  • Homes with basements prone to flooding.
  • Properties with a high water table.
  • Areas with heavy rainfall.

Signs Your Home Needs a Sump Pump:

  • Damp or musty smells in the basement.
  • Pooled water after rain.
  • Foundation walls feel wet or show streaks.
  • Visible mold growth.

A properly installed sump pump acts like a silent guard. It works behind the scenes, keeping your basement dry without you needing to think about it. This simple device can save thousands in water damage repairs.

What is an Ejector Pump?

An ejector pump clears waste and greywater from below-ground plumbing. This includes basement bathrooms and laundry rooms. It may look like a sump pump, but it handles both liquids and solids, sending them to your home’s main sewer line.

How does an ejector pump work?

Wastewater collects in a sealed basin. The pump tracks the level. Once it’s high enough, a powerful motor grinds the waste and pushes it up through pipes to the main drain. This often means working against gravity.

Typical Residential Uses:

  • Basement bathrooms with toilets, sinks, or showers.
  • Laundry or utility sinks below ground level.

Ejector Pump Longevity:

How long do ejector pumps last? Most run for seven to ten years.

Their lifespan depends on how often they’re used, how well they’re maintained, and the quality of the pump.

Ejector pumps do more than move waste. They help prevent messy backups and keep your basement safe.

Electric ejector pump in the store

Key Differences: Sump Pump vs. Ejector Pump

While both systems remove unwanted water, they perform different tasks.

Function:

  • Sump pumps handle only clean or slightly dirty water, like rain or melting snow.
  • Ejector pumps remove wastewater with solids (toilet paper, waste) from below-grade plumbing.

Installation:

  • Sump pumps sit in open pits.
  • Ejector pumps require sealed basins to trap odors and manage waste.

Maintenance:

  • Sump pumps need simple checks and regular cleaning.
  • Ejector pumps need more frequent service due to the nature of waste.

Handled Material:

  • Sump pumps: groundwater or stormwater.
  • Ejector pumps: greywater and solid waste.

A sump pump works well if water intrusion or flooding is your problem. An ejector pump becomes necessary if you add a bathroom, laundry, or any plumbing below the main sewer line.

How to Choose the Right Pump for Your Home

Picking the right system matters for safety and peace of mind. Use this checklist to help:

1. Assess Your Basement:

  • Is your basement finished?
  • Does it include a bathroom, laundry, or wet bar?

2. Examine Plumbing Layout:

  • Are plumbing fixtures below your sewer line?
  • If yes, you probably need an ejector pump.

3. Know Your Risks:

  • Flood-prone homes need sump pumps.
  • Homes with basement plumbing need ejector pumps.

4. Check Local Codes:

Some towns require specific pump types or backflow prevention. A licensed plumber can explain local rules and ensure your system meets the latest standards.

5. Call on Experts:

If you’re not sure, ask Fox Valley Plumbing. We know sump pump installation and repair inside out. Our team has years of hands-on experience helping homeowners find the right solution the first time.

Choosing the Right Pump with Confidence

Both sump pumps and ejector pumps play huge roles in keeping basements dry and safe. Sump pumps keep water out, while ejector pumps safely remove waste from below-sewer-line plumbing.

Still have questions about which pump fits your needs? Contact Fox Valley Plumbing for trustworthy, step-by-step advice. Learn about our sump pump installation and repair services here.

Backflow Prevention commercial water line leak repair plumbing city requirement outdoor leak prevention

Protecting water quality is non-negotiable. It keeps contaminants out of drinking water. If you’re responsible for water safety, understanding backflow standards is essential. This guide will help you choose the right devices and stay compliant.

Understanding Backflow Prevention and Its Importance

Keeping clean water safe isn’t just a good idea—it’s the law in many places. Backflow prevention keeps drinking water safe from harmful contaminants. While the concept might seem technical, its application is practical and essential.

What is Backflow and Why Does it Happen?

Backflow occurs when water flows the wrong way, turning your plumbing into a two-way road. This can bring pollutants, bacteria, and chemicals into your drinking water.

Why does it happen? Backpressure occurs when downstream pressure is stronger than the supply.

Backsiphonage happens when water pressure drops. This can be caused by pipe bursts or heavy nearby use. Both can damage your water system, making prevention crucial.

The Risks of Non-Compliance with Industry Standards

Ignoring backflow prevention can cause health risks, fines, legal issues, and expensive repairs. Protecting water systems is everyone’s responsibility.

Choosing the Right Backflow Prevention Devices

With so many options, choosing the right backflow solution can be confusing. The good news? Every system has a device that’s built to fit its specific needs.

Types of Backflow Prevention Devices and How They Work

The right device depends on your system’s layout and risk level. Air gaps stop backflow by creating space between the water source and contaminants. Double check backflow prevention valves suit residential systems with low risks. For higher risks, reduced pressure zone assemblies (RPZs) offer reliable protection.

How to Select the Right Sewer Backflow Preventer for Your System

So, how do you choose? Start by checking your water pressure, pipe layout, and risk level. A certified plumber or water safety consultant can walk you through this process. Local codes or industry standards may specify which devices you need.

Be sure to check for your specific application. Skipping this step often leads to wasted time or potential penalties.

The Role of Commercial Backflow Preventers

Commercial systems face more complex challenges than residential ones. Large operations need commercial backflow preventers. These are built for high pressure and strict rules. They protect businesses, schools, and factories from risks affecting entire communities.

Maintaining Compliance with Backflow Prevention Standards

Proper installation is just the beginning. Staying compliant with backflow prevention standards requires ongoing vigilance. Regular maintenance and testing are non-negotiable aspects of this process.

Regular Backflow Prevention Testing

Backflow prevention testing is required annually in most areas. Certified professionals ensure devices are working correctly. Skipping tests increases the risk of contamination. Check with your local authority if you’re unsure about inspection dates.

Proper Installation and Maintenance Protocols

Even the most expensive device won’t protect your water if it’s installed wrongly. Working with licensed professionals ensures everything is set up properly.

Maintenance also plays a big role. Sediment and wear can reduce a device’s effectiveness. Clean it regularly and replace parts as needed.

Keeping Up with Local and Industry Regulations

Codes and standards change, so staying updated is crucial. Local authorities or water agencies often share updates through newsletters or public notices. Don’t stick to outdated practices. You must know the rules and follow new regulations as they come.

Common Challenges with Backflow Prevention and How to Solve Them

Challenges can arise, but understanding common issues helps keep your system running smoothly.

Identifying and Preventing Sewer Backflow

Sewer backflow brings dirt, bacteria, and odors into drinking water. A sewer preventer stops wastewater during floods or blockages. Install it in vulnerable areas and check it after severe weather.

Troubleshooting Faulty Backflow Prevention Devices

Sometimes, devices fail. Signs like dripping, strange noises, or a drop in water pressure may suggest a problem. Don’t ignore these red flags. A plumber can quickly diagnose whether a repair or replacement is necessary.

Addressing Water Pressure Issues in Your System

Water pressure that’s too high or too low can interfere with device performance. Pressure regulators or pumps can balance the system. This helps your backflow prevention work properly. Monitoring pressure regularly is an easy step that pays off in the long run.

Backflow Testing and Repairs You Can Trust

Backflow prevention is essential for safe water. Choose the right devices, test regularly, and stay updated on rules. Whether for your home or business, we ensure your water stays clean, safe, and protected. Learn more about our backflow testing, installation, and repair services here for peace of mind.

White water heater tank leaking with blue and red plumbing tools at the side

Water leaks don’t just damage your property. They can also cost you considerable amounts of money! Did you know that you can save up to 10% on your utility bills by preventing water leaks? With that in mind, let us show you how to avoid water leaks – and what to do if you find a leak at home.

1. Check Your Water Pressure

Monitor your water pressure for changes. You could already have a leak, or risk a leak, if:

  • Water flow is weaker than usual
  • You can’t get hot water
  • Hot water is weak or intermittent

Our team can help if you suspect there’s a pressure problem in your plumber system.

2. Perform Regular Plumbing Inspections

Regularly inspecting your pipework, appliances, and outlets can prevent water leaks. Keep a close eye on:

  • Toilets
  • Pipes
  • Hoses
  • Water heaters
  • Tanks
  • Sump pumps
  • Gaskets and other plumbing components

If you notice any signs of wear and tear, replace or repair the part. Ignoring damage can lead to bigger and more expensive problems.

3. Look for Water Damage

Already concerned you have a leak? Even if you can’t see a leak, you might spot signs of water damage. The most common signs include:

  • Damp patches on walls, floors, or ceilings
  • Peeling or flaking paintwork
  • A musty or damp smell
  • Visible mold e.g. black, brown, or grey patches

Even a small leak can cause serious property damage over time. If you identify water damage, call us for help.

4. Maintain Your Appliances

Regular maintenance is just as crucial as inspecting your plumbing.

Keep your appliances, such as washing machines and dishwashers, in good working order. And replace any old appliances which you can’t repair. Although you have an initial outlay, it could be cheaper than a leak which goes undetected!

5. Keep Your Drains Clean

Blocked and clogged drains eventually damage your pipework. Damaged water lines may result in leaks over time.

  • Don’t put anything such as food or other solids down the drains.
  • Clear clogs quickly.
  • Regularly check your drains for buildup.

6. Inspect Frozen Pipes

Frozen pipes are sometimes inevitable. But a sudden flow of hot water through a frozen pipe can result in leaks or bursting.

You can avoid many frozen pipes by insulating your pipework. Or, slowly run a tap (no more than a drip) during a cold spell. This helps to keep water moving through the plumbing system.

Suspect a frozen pipe? Gently thaw it with, for example, a hairdryer. Turn off your water supply and inspect the supply line. Contact us if you’re concerned about the health of your pipework after a hard frost!

What if I Find a Water Leak?

First, don’t panic. Now you have identified the leak, you can take steps to resolve it. Once you detect a water leak, here’s what to do.

  • Turn off your water supply. Typically, the shut-off valve is near your water meter. Or it may be close to the leaking appliance, faucet, or toilet.
  • Inspect for signs of property damage. Look for damp or mold patches, or a musty smell. These signs, as mentioned, indicate a larger water damage problem. They may also suggest a long-standing leak.
  • Call Fox Valley Plumbing. Our team is ready 24/7 to assist with any water leak in Elgin, IL. And the quicker you contact us, the sooner we can fix the problem. And the lower the risk of significant damage to your property.

Water Leak Repair Services in Elgin, IL

Some leaks occur without warning and there’s nothing you can do to prevent them. However, regular maintenance and inspections can reduce the risk of water leaks. At Fox Valley Plumbing, we provide a range of services for homes and businesses. We can service your plumbing outlets and appliances and identify problems before they become full-blown leaks.

In some cases, leaks can mean wasting up to 90 gallons of water per day. The sooner you act, the less water you’ll waste – and the more money you can save. Whether it’s an emergency or a regular inspection, call us now to schedule a visit!

Close up of yellow gas pipe and wrench for gas line installation

Got a new gas dryer? Chances are, you want to get up and running right away. But if you don’t already have a gas line in place, you’ll need to install one first. Below, we explain how to install a gas line for a dryer, and when to call us for help.

Can I Install My Own Gas Line?

Yes. If you have the right tools and know-how, you can install your own gas line at home. However, working with natural gas is no easy task.

  • When performed incorrectly, gas pipe installations can cause leaks. Gas leaks are dangerous because they change the amount of oxygen in the air.
  • Low oxygen causes symptoms such as headaches, nausea, and dizziness.
  • In serious cases, undetected leaks can cause death.

As a DIY job, connecting gas appliances is usually easier than installing a gas line. The Fox Valley team can handle any residential or commercial gas installation. Just give us a call to learn more.

H2: How to Perform a Dryer Gas Line Installation

Your first step is knowing your gas line layout. You need to know where your gas valves are and how to shut off the gas when required.

Once you know the layout, you can move onto the installation process.

1. Choose the Right Gas Pipe and Materials

You will need plumbing tools and materials including:

  • Pipe wrench
  • Adjustable wrench
  • Plumbing tape (Teflon tape or strong flex tape)
  • Pipe fittings (usually steel but other pipe materials are available)
  • Gas dryer connector kit

Can you use a flexible gas line for a dryer? To comply with local and state building codes, you should use rigid rather than flexible piping for the actual supply line. Flexible connection pipes may be less vulnerable to damage.

What about deciding on what size gas line for a dryer installation? It all depends on your existing setup. What’s important is that the piping and fixtures align properly to prevent leaks.

The pressure moving through the pipework matters, too. The more appliances a gas line supplies, the greater the risk of leaks if there’s a loose fitting.

Unsure how to measure, or choose the right materials? Call us for help.

2. Turn Off Gas Supply

Go to your gas shut off valve and ensure it’s turned off. Never perform gas repair or installations without turning off the gas!

3. Create the New Gas Supply Line

Next, fit the pipe lengths and valves you need to extend the gas line to the dryer. You will also need to coat the “threads” of the gas lines to completely seal the pipework and prevent leaks. If you don’t have access to strong enough tape, you can use pipe dope.

4. Use a Gas Dryer Connector Kit

Depending on your dryer model, you may be able to buy a gas dryer connector kit. These kits make extending supply lines much easier. Check with your local hardware store to see if such a kit is available.

5. Check for Leaks

Once you connect the dryer to the gas line, you need to check for leaks. It’s easy to do this – all you need is the “bubbles test”.

  • Turn your gas on.
  • Mix some water and dish soap.
  • Spread the liquid over the joints.
  • If you see bubbles, that means there’s a gas leak. Tighten the connection using a wrench.
  • No bubbles? Your gas line is secure.

Installing a gas dryer can be tricky. For example, maybe you can’t tighten the joints enough, or you don’t know how to check for leaks. Call our team if you’re unsure about installing gas appliances.

6. Move the Dryer into Position

Once you’re happy with the installation, you can move the dryer into its final position. You might want to double-check that the hoses and attachments are still secure now that you’ve moved the dryer.

When to Call a Professional for Gas Dryer Installations

If you know how to install a gas line for a dryer, it’s possible to attempt this job on your own. However, if you have any doubts, call Fox Valley Plumbing. There are simply too many risks with gas lines to take any chances!

Our Illinois residential and commercial plumbers are on hand to help with any gas installation. We are committed to providing safe gas line services for any property. Call now to schedule an appointment or get an emergency service.

The garbage disposal, which enables us to get rid of waste quickly, simply, and without having to drag bags of rubbish to the curb each week, is one of the most practical technological achievements. However, the garbage disposal’s function isn’t to take the place of the trash can or recycling bin, and it’s simple to neglect garbage disposal maintenance, which may mean you need a replacement sooner than you anticipated.

Garbage Disposal Dos:

  • Use cold water: Although it may seem counterproductive because hot water breaks down food more effectively, using cold water can damage your garbage disposal drain. Greasy things can break down and flow down the drain with the help of hot water, but those shattered pieces may coagulate and cause a clog farther down the line. Using cold water can help oily items solidify and go more readily down the garbage disposal drain as opposed to clinging to the pipe’s walls.
  • Use it frequently: It can sound strange to be urged to use your waste disposal, but occasionally we could believe that using it sparingly will extend its lifespan. The exact opposite, though, is true. Without consistent use, the garbage disposal is susceptible to corrosion and rust, which may necessitate its replacement earlier than anticipated. Additionally, doing so keeps the disposal’s components moving and prevents waste from building up and clogging the mechanisms.
  • Use your recycling and garbage bins as usual: The presence of a garbage disposal does not permit the removal of a trash can or recycling container. Despite being a useful appliance for any kitchen, a garbage disposal should never be used in place of a traditional trash can and recycling container. The amount of garbage in your recycling containers shouldn’t change, and your trash can is still the ideal location to put anything that isn’t food that can biodegrade.
  • Keep it clean: A clean garbage disposal will continue to function effectively and will keep any unpleasant odors at bay in addition to helping to prevent blockages and clogs. In order to avoid trash building up inside the mechanics, it’s also necessary to keep it clean by emptying it or periodically running some diluted dish soap and water through it.
  • Cut up large foods: Make sure the waste you throw into your garbage disposal is in little pieces to prevent clogging or blocking. Although a garbage disposal’s mechanisms are excellent at dissolving food, they are not intended to dissolve large pieces of food, so it is best to chop or tear up bigger pieces of food before placing them in the disposal.

LOOKING FOR RESIDENTIAL PLUMBING IN  ILLINOIS?

CALL NOW (847) 624-3872

Garbage Disposal Don’ts

  • Don’t try to sharpen the blades: Contrary to popular belief, a garbage disposal’s impellers are blunt, so there is no need to attempt to sharpen them with big chunks of ice or eggshells. These things might damage your garbage disposal, causing problems and unneeded repairs.
  • Avoid using hot water: As previously noted, hot water might be able to dissolve any grease or fat that finds its way into your garbage disposal, but the grease and fat will harden as it travels further down the pipe, perhaps causing more trouble in the future.
  • Don’t shut off the motor too quickly: Until all the food has been ground up, you should ideally leave both the motor and the cold water running. It is fine to switch off the motor once the grinding has stopped, but make sure the water is still running for at least 15 seconds. This will decrease the likelihood of buildup and clogs since the garbage disposal will be able to thoroughly break down all the food, and the running water will remove any leftover pieces.
  • Avoid using harsh chemicals: Despite what it may seem like, pouring bleach in a garbage disposal is not a smart idea. Harsh chemicals have the potential to damage your garbage disposal’s internal workings, resulting in subpar performance.
  • Don’t put too much at once down the disposal: Avoid pouring huge quantities of anything into the garbage disposal since, despite their capacity, they are designed to handle lesser amounts of food waste. If you have a lot of rubbish to get rid of, feed it into the garbage disposal gradually, ideally in smaller bits or pieces.

How To Clean Your Garbage Disposal

Depending on the problem, there are three ways to empty your garbage disposal or unclog a jammed garbage disposal:

  • Check for clogs and clear obstructions: If you believe your garbage disposal is clogged, there are several techniques to clear the blockage. Simply shut off the garbage disposal and remove the obstruction using pliers or kitchen tongs — never your hands alone.
  • Clear the drainpipe: If there is an impediment in the drainpipe, a clog in the garbage disposal can result in a clogged sink. Plug the disposal, add some dish soap and water to the sink, and then empty the sink while using the disposal. Any recalcitrant waste particles that may have been attached to the pipe should be removed with the help of gravity and the water pressure.
  • Use a plunger: To remove a really stubborn clog that is too deep to reach with tongs or pliers, try using a toilet plunger. After then, you have the option of pulling it out or letting it fall.
  • Baking Soda and Vinegar: One cup of baking soda should be run via the garbage disposal. It should be pushed through the aperture using a rubber spatula. Pour Pour a cup of vinegar down the garbage disposal.

LOOKING FOR RESIDENTIAL PLUMBING IN  ILLINOIS?

CALL NOW (847) 624-3872

Spot Potential Repair Scams That Might Lead to Poor Plumbing Work

Plumbing plays an important role in the proper functioning of a home. Therefore, it is important that you take the utmost care and caution when repairing any work related to plumbing.

Always do your research and be aware of potential plumbing scams. Know what to expect from the professional plumbing experts who come to service your plumbing problem.

Looking For A Quality Plumber In Elgin, Illinois?

Call (847) 624-3872

How to Avoid Potential Plumbing Repair Scams

Seek Multiple Estimates
Before finalizing your decision about hiring a plumber, you should seek out at least three estimates with their detailed breakdown costs. If you find any plumbing contractor is proactively giving the quote over the phone, it would be better to avoid him.

After all, a plumber should be able to assess the damage and cost of repairing them only after visiting the job site.

Once you receive the estimates, you need to compare them and if you find one of the quotes is much lower than the others, you should be leery about it. An excessively lower estimate does not include all the labor and equipment costs for which you will be responsible for paying before finishing the plumbing work.

Before starting the job, you need to pay a specific amount of money as a down payment. Usually, 10% of the total plumbing cost is considered as the standard down payment amount. But when a plumber asks for a larger amount, you should be suspicious as it will raise the chance that he could take the money and run.

Looking For A Quality Plumber In Elgin, Illinois?

Call (847) 624-3872


Beware of Theft
If you are living in a rental or apartment building, you need to be aware of common scams as a plumber may claim that he has been sent by the house owner or the water department and instructed to check the water connection and do some necessary repairs.

In many cases, these are fake people whose intent is to steal valuable items from your household. Therefore, you must verify the identity of a plumber from the homeowner or the building supervisor before letting him enter into the house.

Compare, Compare and Compare
Another common scam is to seek money in the name of expensive parts. But in reality, the plumbers use the cheaper parts and a major portion of the profit goes to their own pockets.

Hence, whenever you are asking for a quote, instruct the plumber to mention the make and model of every major part or equipment. Then, compare the cost of each item with the local building supply store to know whether any major price difference is there.

Looking For A Quality Plumber In Elgin, Illinois?

Call (847) 624-3872

You Don’t Always Need To Call A Plumber

Use These Tips From Fox Valley Plumbers in Elgin, Illinois – Lets face it plumbing skills are a great addition to anyone’s skill set. It reflects a level of care in the maintenance of your home and the ability to address concerns in your own way. That is a very admirable quality. Like any other skill, you can always build and improve. These tips will help you do that.

Odor Removers

Odor removers such as bleach toilets are not good for your plumbing system. These products will reduce the smell, but they will also cause problems with the rubber gaskets. Over time, the damage will accumulate and could eventually stop the toilet from functioning at all.

fox-valley-plumbing-bio-clean

Look For Damage

Inspect around the toilets for softness in the floors to see if any damage has occurred. Straddle the toilet, so you can rock from one leg to another to determine whether there’s weakness in the floor. Picking up on any problems now will definitely work to save you money later. It’s the difference in a little maintenance and total floor replacement.

Call (847) 624-3872

Invest In A Strainer

A strainer should be placed over all the drains in order to gather particles that would just get in the drain and potentially cause stoppage. Whenever large particles become trapped in the strainer, remove them. Clean bathtub drain screens as often as needed.

Use This Tip For Your Bathtub

A great maintenance routine for bathtub drains is to pour baking soda and vinegar into the drain opening once a month. Cover the drain with an old rag, because there will be a chemical reaction taking place inside the pipes. Flush it with boiling water after a few minutes. This procedure should be able to clear pipes of hair and soap scum.

Overflow Holes

Ensure your overflow holes aren’t clogged up. Overflow holes are used in case the sink starts to overfill, which may not seem like a big problem–until it is. Clear overflow holes when doing periodic checks for problems and plumbing issues that should be addressed.

The Use Of Cold Water

Always use cold water when your garbage disposal is running. Cold water keeps blades sharp and allows for smoother disposal. When you use hot water, any grease that is in the garbage will melt and be more prone to stopping up your drain.

Now you have the necessary tools, the knowledge and skill set needed to apply to your own plumbing system. This is wonderful! These tips and other online resources are available to help you fix almost any plumbing problem. When you never stop learning new skills, you never stop improving. You may even find a plumbing job or idea you like.

Call (847) 624-3872

[vc_row][vc_column][vc_column_text]

Get Those Pipes Working Again With These Tips

Now is the right time to learn about plumbing. If you can fix small problems by yourself, you won’t have to hire a plumber and you can prevent large plumbing problems. Take a few minutes to read the incredible tips in the below article. If you do so, you’ll be pleased you took this time to learn more knowledge about plumbing in case any issues arise.

If you have pipes that make hammering and squeaking noises, you have one easy repair. Anchor exposed pipes to get rid of noises. Call a plumber to help with pipes that require you to cut a hole in a wall, ceiling or floor.

Think about what plumbing work you need, then schedule them all at once. This allows you to save up for necessary parts and equipment while saving money on hiring a professional. It also saves you money because a lot of plumbers charge by the hour–they cannot charge for multiple hours every trip if they only make one trip out.

Call a Pipes & Drain Specialist at
(847) 624-3872

The Power Of Using Baking Soda & White Vinegar

Putting a cup of any kind of baking soda followed with a cup of white vinegar each month will keep your drain running smoothly. Cover the drain with a plug or rag as you wait for the chemical reaction between the vinegar and baking soda to happen in your pipes. Wait for a little while and then allow boiling water to go down the drain. This method should clear your pipes of accumulated hair and soap scum.

Use Plenty Of Cold Water

To keep your garbage disposal working at its best, use plenty of cold water when you turn it on. The cold water will help keep the blades nice and sharp and will allow for a much smoother disposal. When you use hot water, any grease that is in the garbage will melt and be more prone to stopping up your drain.

fox valley plumbing kitchen garbage disposal install

An Improperly Installed Water Hose

Having water leaking into the dishwasher, however annoying, is luckily an easy fix. The hose that runs from the kitchen sink to the dishwasher is not installed properly, and can be corrected quickly. The hose going from the dishwasher to the sink must go downhill, and then uphill, to prevent water mixing from the two devices.

fox valley plumbing dishwasher water hose

It’s essential to know some basics about general plumbing and the specific plumbing in your home. You will be able to save yourself a bunch of money, plus many of your friends and family members will come to you for advice. You hopefully understand some plumbing basics now and had fun learning them.

Call a Pipes & Drain Specialist at
(847) 624-3872

[/vc_column_text][/vc_column][/vc_row]